• 07Mar

    Have you ever had cornmeal mush? Kyle hadn’t until I introduced him to it, but now he loves it. It was one of my favorite breakfast foods growing up. We got in a tube at the grocery, cut it into slices, fried it until crispy on each side, then served with a little syrup over top. It may not sound or look the most appetizing but it combines salty and sweet in the perfect way.

    The other morning, I was craving it, but I didn’t feel like going to the grocery, and I remember my mom telling me one time that you can make it, so I thought I’d look it up and see if we had the ingredients. And guess what? It is the simplest recipe ever with only 3 ingredients and very little work. Basically if you have cornmeal and little bit of time, you’re set. I looked up a few recipes, and while some had different amounts and different cooking times, they were all pretty similar, so this is what I used:

    Corn Meal Mush Recipe

    1 cup cornmeal

    3 cups water

    1 teaspoon salt

    Mix all ingredients in a small saucepan. Put it on the stove on medium-high to high to bring it to a boil. Stir while you’re waiting, stopping every now and then to see if bubbles have started to come up. Once it starts boiling (it might start popping a bit so be careful), turn the heat to low and cover and let it cook for about 15 minutes. After this, it should be fairly thick, sticking to your spoon when you dip it in. Then pour the mush into a loaf pan or pyrex dish and put it in the fridge or freezer to cool. I put it in the freezer for a bit because I was anxious to eat it, but then stored it in the fridge afterward. Once it has cooled, it should be fairly solid, and you can slice it and fry it in a pan over medium heat with some oil or butter, until it is crispy or light golden brown on each side. Serve plain or topped with maple syrup or honey.

    Cornmeal mush is also similar to polenta. Apparently, according to some random website I just looked up, polenta uses a thicker ground cornmeal while cornmeal mush uses finely ground, which is similar to flour (the same as what is used to make cornbread). Also, polenta may use a broth instead of water as its liquid. However, I think the above recipe could be used for anything that calls for polenta too, using it before cooling if that is the consistency it calls for or after cooling if it calls for something fried up.

    I love cornmeal mush. I didn’t get any pictures because Kyle and I ate it too quickly. Give it a try sometime and you might love it too!

  • 01Feb

    Last night, Kyle and I had some friends over to make and eat pizzas.  Two of these friends are from Cincinnati, and we’ve developed a working theory that people from Cincinnati are very particular about their pizza.  This is based on a total of three people, so, like I said, just a working theory.  So we’ve had many discussions about pizza and where to get good pizza.

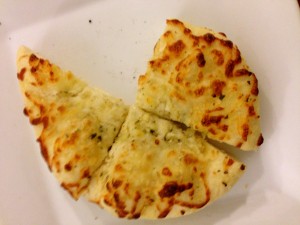
    Since we’ve gone to grad school, I’ve been trying to make healthier versions of quick meals that we can put in the freezer and make when we’re being lazy in an attempt to avoid going out to eat or buying pre-made food from the grocery.  One of these meals has been frozen pizza.  I make the dough, partially bake it, put the toppings on, freeze it, and then we can have pizza for dinner in about 10 minutes.  Our friends have been curious about the dough I make, so we planned a pizza night.  We made personal pizzas so no one had to compromise on toppings, and it was a great night: friends, pizza, garlic-cheese bread, white chocolate truffle popcorn, bourbon, and hockey.  Although the Preds couldn’t pull off the win last night, it was a lot of fun, and our Cincinnati friends gave it their approval for good pizza.

    IMG_1565 IMG_1567

    I use one of various recipes from the book, “Artisan Bread in 5 Minutes a Day.”  They have a particular pizza dough, which I used last night, but I often just use their basic recipe, substituting in about half whole-wheat flour to make it a little healthier.  Both make great pizzas.

    Pizza Dough recipe (can also be found at http://www.artisanbreadinfive.com)

    3-1/4 cups lukewarm water

    1/4 cup olive oil

    1 tablespoon yeast

    1-1/2 tablespoons kosher salt

    2 tablespoons sugar

    7-1/2 cups unbleached all-purpose flour

    In a large bowl, with a lid that is not air-tight, put in the yeast, salt, and sugar.  Then pour the liquid over these.  Finally, put in the flour, and mix with a mixing spoon until just combined.  Put on the lid and let rise for 2-3 hours.  Once it has risen, you can use it or put it in the fridge for up to two weeks.  It will become more of a sourdough the longer it sits, but it’s still good!

    To use the dough, first pre-heat the oven to 500 degrees with a pizza stone in it to heat up too.  Then sprinkle some flour on a cutting board (or pizza peel) and on top of the dough (so your hands get well-floured too).  Pull out about a handful of dough and shape it into a ball.  Then flatten it on the cutting board and roll it out with a rolling pin (also dusted with flour).  Add more flour as you need to make it less sticky.  Once the dough is rolled out, you can put cornmeal or whole-wheat flour underneath so it will slide off onto the pizza stone, but I find it is easier to just put it on parchment paper and let it bake on the parchment paper.  Makes for a cleaner process, too.  I find you can re-use the parchment paper a couple times too.

    If you’re making the pizza to eat right away, you can put on your toppings, and then bake it for about 8 minutes, depending on how thin you rolled out your crust.

    If you want to make frozen pizzas, first put the crust in the oven for about 3 minutes; then take it out and let it cool.  It may have puffed up some – just pat down the bubbles.  (If you want pita bread, leave it in for about 8 minutes and it will puff up all the way and make a pita pocket great for sandwiches!)  After it has cooled, put on your toppings, stick it in the freezer on a plate or tray for an hour or two until it is fairly hard, and then wrap it up in saran-wrap and/or foil and put it back in the freezer for whenever you want it.  Since it is already partially baked, when you take it out of the freezer, you only have to bake it 8-10 minutes in a 450-500 degree oven.

    If you’d like to make a bit healthier dough, here is what I use to add whole-wheat:

    Basic Bread Dough (can also be found at http://www.splendidtable.org with the only alteration in adding the wheat flour)

    1 1/2 tablespoons yeast

    1 1/2 tablespoons kosher salt

    3 cups whole wheat flour

    3 1/2 cups unbleached all-purpose flour

    3 cups lukewarm water

    Mix it up in the same way as above, putting in the yeast and salt, then water, and finally flour.  Mix until just combined.  Put on the lid and let rise for 2-3 hours, then use or put in the fridge for up to two weeks.  Use it the same way for pizza dough as above.

  • 21Jan

    A few years ago, I became a bit obsessed with kale chips (as did a lot of the world, according to the internet).  After making them for some friends one time, we started talking about some of my other cooking and a suggestion was made that I write a cookbook.  Well that never happened, but Kyle came up with what we thought was the best title ever (being the dorks that we are): The Book of Kales.  However, I knew I couldn’t write a whole cookbook on kale, so I modified it to The Book of Kales and Other Cruciferous Vegetables.  It turns out, I love cooked cruciferous vegetables, particularly when cooked in an iron skillet to get some crispiness.

    If you’ve never heard the word cruciferous before, you’re probably not alone.  I hadn’t heard it until I googled kale, but it has several plants that I wouldn’t have expected to be related.  Some include broccoli and cauliflower, brussel sprouts and cabbage (not that surprising), but also horseradish, wasabi, and mustard, turnip, arugula, and radish.

    Anyway, my cookbook never happened, but I did write up some recipes, including my kale chips, as well as some opinions on some basic cooking ingredients and techniques, which I can now scatter into my blog entries here if they become relevant.

    Kale Chips

    Ingredients:

    •      1 bunch kale, or 1 bag chopped kale
    •      1-2 tablespoons olive oil
    •      Large pinch coarse salt

    For Kale Chips, I like to use curly kale, but any type should work, though the time to crisp may vary.  Preheat the top broiler in your oven.  Wash the kale, and tear the kale leaves off the thick stems.  Some people cook and eat the stems as well, and if you want to do that, you can chop them up into about inch long pieces.  Then either chop or tear the kale leaves into small pieces, about one inch by one inch.  The smaller they are, the easier they can spread out and the crispier they get.  Dry the kale with a towel or just spin dry in a salad spinner.

    Spread the kale out on a cookie sheet, preferably rimmed, then drizzle olive oil lightly over the leaves, probably about 1-2 tablespoons for one bunch of kale.  Then sprinkle a large pinch of coarse salt over the kale (don’t over-salt, you can always add more later if you need it).  Take some tongs and stir the kale up to distribute the olive oil and salt.

    Put the tray under the broiler for 5 minutes.  Then change the oven temperature to 400 degrees Fahrenheit.  Pull the tray out and stir again with the tongs.  Then leave in oven for 10 more minutes.  Take out tray.  Depending on how thick your layer of kale was, the chips could be done.  They will crisp some as they cool, but if you want them crispier, put them back in for 5 more minutes, or until they reach desired crispiness.  Let cool for 5 minutes, and enjoy.  Kale chips are best eaten immediately; however, they can be stored in an airtight container for a day or two, though they don’t stay very crispy.  You may want to reheat in a toaster oven or oven, though not for too long or they will burn.  Probably 5 minutes in a 350 degree oven should do it.

    Some variations on kale chips that I like are using a flavored olive oil, such as red pepper infused or garlic infused.  Or adding some red pepper flakes, garlic powder, smoked paprika, or dried herbs after sprinkling on the salt.

  • 12Jan

    As many of you know, I love to cook and eat, and I’ve decided to try to document my successes, and maybe some of my failures too, with this blog: The Book of Kales.